Well, it’s been a busy couple of weeks here. Lots of activities with the boys playing baseball, working on projects around the house and a ton of other things!
On the JBMV track bike front, the forks are complete, aligned and headset race is faced. From there I went on to fit the BB shell to the chainstays and do the blacksmith work that always comes with using lugs and lugged BB shells. Lugs and shells come in several different configurations each having slightly different angles and they almost never all fit the design of a given bike. Therefore, it’s inevitable that some blacksmith work has to happen. Generally, I move the sockets with a longer solid bar that fits snugly in the socket. Once the angles are correct, I use a brass or aluminum drift and a small hammer to pound against the bar while it’s still in the socket to snug the socket back up around the tube in the new, correct angles. This is all done cold. This is when I will put the finishing curves or points on the sockets, square up the edges and remove any marks from the outside of the shell. Each socket has to fit the tube snugly and the angles have to be per the design so there isn’t any binding and the filler can flow evenly between the tube and the lug socket walls.
 //embedr.flickr.com/assets/client-code.js
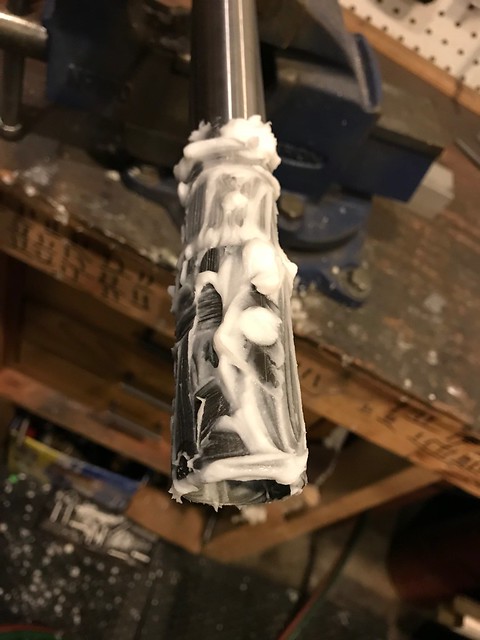
The next step is to re-inforce the seat tube at the top tube and seat stay junction. This is a highly stressed area and typical seattubes have wall thicknesses of only 0.6mm. That is much to thin to handle the heat that goes into this area during construction as well as the ongoing stress of riding. When not using lugs, it’s important to re-inforce this area with a sleeve. I use 56% silver filler to braze the sleeve on. The low temp retains more strength for this highly stressed joint. This first image shows the sleeve all fluxed up and ready for heat:
 //embedr.flickr.com/assets/client-code.js
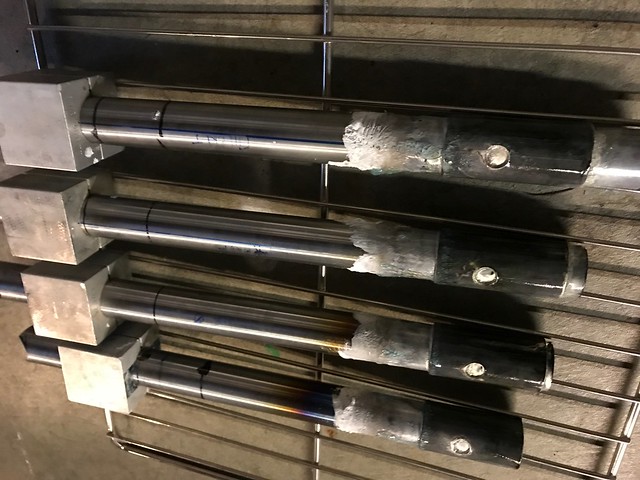
This picture shows the 4 seattubes with their sleeves brazed into place and cooling on my rack:
 //embedr.flickr.com/assets/client-code.js
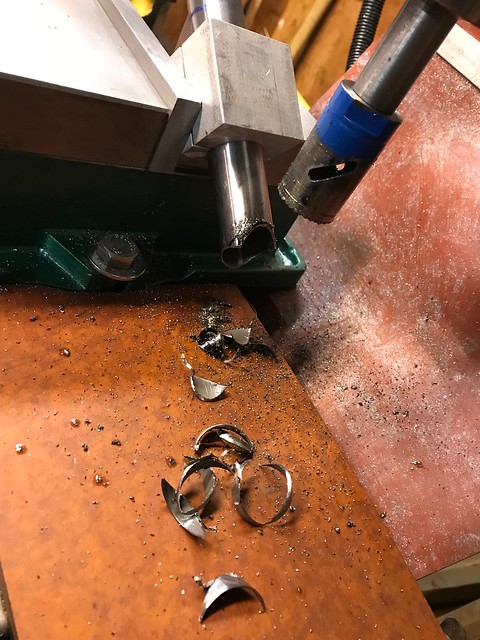
Once I have the sleeves brazed in place, I can miter the downtubes to size. They get a compound miter. One miter is axial to make room for the bottom bracket within the shell and the second miter makes a tight fit with the junction with the downtube.
 //embedr.flickr.com/assets/client-code.js
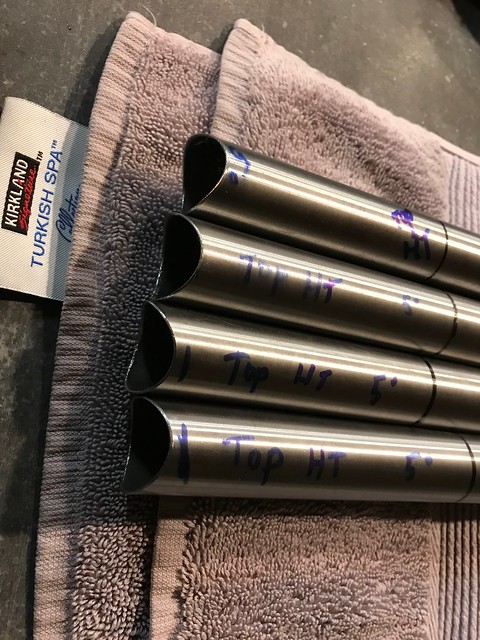
Earlier today I finished up mitering all of the main tubes so, this weekend, I should be able to tack and braze one or two of the front triangles. I would like to get all 4 front triangles completed but that might be too ambitious.
 //embedr.flickr.com/assets/client-code.js
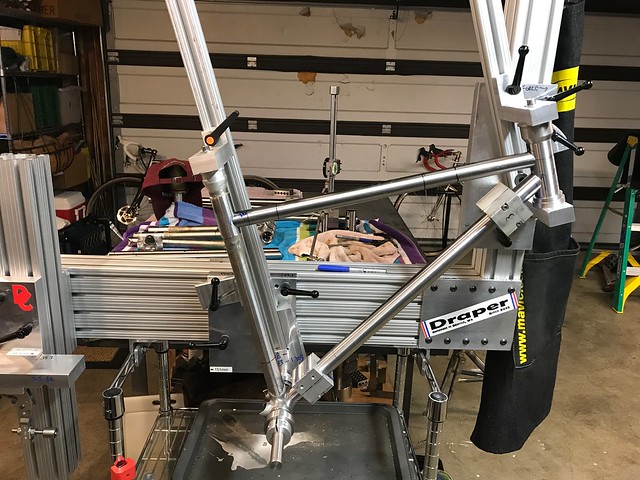
And the tubes assembled into a front triangle in the jig:
 //embedr.flickr.com/assets/client-code.js
Thanks for stopping in and check back soon!
