I thought I would document what happens after a client clicks ‘Submit Deposit’ and takes a spot in the build queue.
Generally, we’ll have had some interactions by that point. Our first interactions might be through email, or social media and maybe by phone. We’ll be in agreement about what general type of bike you want, how you’re going to ride it and where and what your cycling goals are. We’ll probably have talked about your best day on the bike as well as your worst.
Most of my clients aren’t local so I don’t always have the luxury of riding with them. If I can, I like to see you ride your current bike. If I can’t, it’s ok. I have a form that is completed with some pretty foolproof measurements that I can use to get very reliable fit measurements. You can expect to spend a lot of time talking about rides you have done, what other bikes have fallen short and other general fitness topics. Finally, we talk about your cycling trajectory. I always find this most interesting. This is a bike you’ll ride for a long time, and it has to fit where you’re going, not only where you are! Now days we spend a lot more time talking about wheel size and tire size than we used to. Used to be pretty obvious that you were going to either use a 26×2.00 tire or 700c x 23mm tires. By the time you read this, the new standard might be to use BOTH!
As our discussions progress and get more specific, I start the design phase. I plug the fit dimensions into the software and tweak the geometry and tubing choices to balance the weight bias and fine tune the ride and handling of the bike while minimizing weight. When I’m done with this, I output the design to PDF and shoot it off for your review. Then we usually have a few discussions about why certain dimensions are what they are, why this tubing instead of that tubing. I enjoy educating clients on these aspects of the frame they are ordering.
Also, at this time, we determine what parts will be used. Specifically, if the client is re-using parts or wants vintage parts, those can take a bit more time. I like to receive the parts that will be used or order them so I can have them on-hand during the build process.
Once we’re ok with the design and all of the choices, I print it out on extra large paper so I can take notes on it and have it on my bench as I work.
During this finalization phase, I will start working on lugs or sleeves or other bits and the client will start to get pictures to show progress and get feedback on design elements. And as silly as it seems, the client should start to think about color!
Then the work starts:
- Order materials – I use several suppliers depending on what is needed.
- Receive materials into inventory – This includes lugs, bottom bracket shells, tubes, forks, etc. I compare everything to the invoice and my original order and then put everything in a box so everything stays together. The client name is written on the box with serial number. If anything isn’t currently available we’ll talk about substitutions or alternatives.
- Get familiar with materials. This includes inspection, some rough mark ups, measuring and just making sure everything is what it should be. Because of my obsessive nature and focus, this step usually turns into blueprinting the bottom bracket shell and starting to turn down or carve seattube sleeves or lugs. I’ll insert tubes into any sockets or sleeves just to check how much manipulation will be required. I will often measure and mark tubing butts and put tubing blocks on the tubes at this point. It’s a little bit like meeting the parts for the first time and understanding what I have to work with.
- Pick all of the other little bits that come from inventory like bottle bosses, cable guides etc. and put them into a little container that goes in the box with the tubes and fittings. I’ll make whatever little pieces are specific to the project like cable hangers or mounts for lights etc. I note on the design documents my thoughts as I gather pieces. These notes include drawings of custom details.
Now, I’m getting pretty close to cutting tubes. Beyond this point, changes might cost money or time so we do a final check in to make sure nothing has changed.
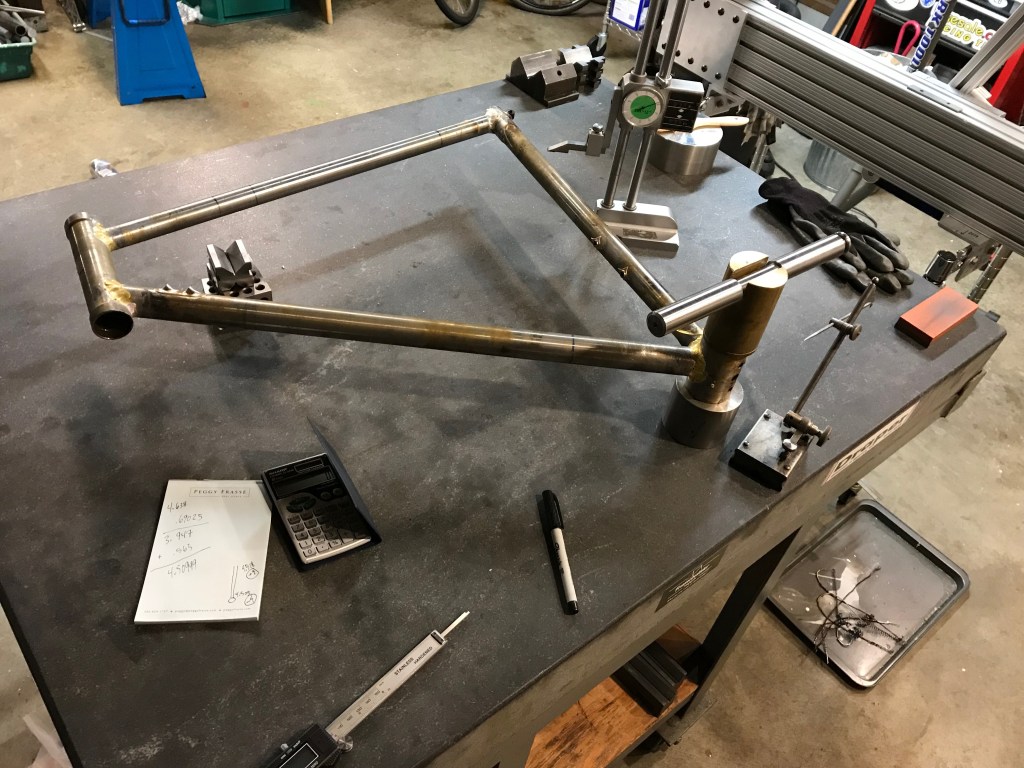
Once we finalize the design, I set up the fixtures and start cutting, filing, brazing and aligning. I start with the fork and stem and racks if they are part of the project. When everything is brazed together and I’m satisfied, I ream, face, chase and dry fit parts before sending off for paint. After a frame returns from paint, the threads get chased again, faces are cleaned up and it gets a coat of corrosion prevention so the frame will last a lifetime.
This is one of the most important pieces of equipment used in each frame: